Introduction
It might be difficult to find moments of tranquility in the fast-paced world of today’s life. DIY fidget toys with paper provide a unique and successful way to deal with stress and anxiety.
This post will show you how to make a variety of fidget toys with paper, a material that is easily accessible. These toys are not only simple to construct, but they also offer a pleasurable sensory experience.

Table of Contents
Let’s explore the world of DIY fidget toys with paper and learn about the therapeutic advantages that they can provide.
Benefits of DIY Fidget Toys with Paper
Relieves Stress and Anxiety
Fidget toys provide an outlet for anxious energy, which aids in stress reduction. Fidgets repetitive motions can have a relaxing impact on the mind.
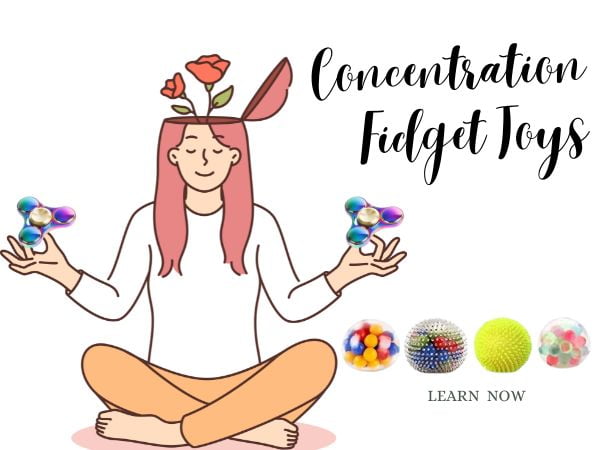
Enhances Focus and Concentration
There is something in fidgeting that can help in enhancing focus for many people, especially in situations requiring sustained attention, such as at meetings or when studying.
Encourages Mindfulness
Fidget toys can promote awareness by directing your focus on the present moment. This exercise can be very helpful in dealing with worried thoughts.
Why Paper?
Paper is a flexible and plentiful material that is ideal for making fidget toys. It’s simple to work with and can be converted into elaborate designs that will keep you entertained and relaxed for hours.
Materials Needed for DIY Fidget Toys with Paper
Let us gather the necessary items before embarking on our artistic journey:
1. Various Types of Paper
- Colored construction paper
- Origami paper
- Old magazines
2. Cutting Tools
- Scissors
- Craft knife (optional)
3. Adhesive
- Glue stick
- Double-sided tape
4. Additional Embellishments (Optional)
- Stickers
- Markers
- Washi tape

Where to Buy Material for DIY Fidget Toys with Paper
You can buy materials for DIY fidget toys with paper at a variety of places. Here are some options:
- Craft Stores: Craft stores like Michaels, Hobby Lobby, or Jo-Ann Fabric and Craft stores typically have a wide selection of paper and crafting supplies.
- Stationery Stores: Stores that specialize in stationery and office supplies often carry a range of paper options.
- Online Retailers:
- Amazon: Amazon offers a vast selection of paper types and colors that can be used for DIY projects.
- Etsy: Etsy is a great place to find unique and handmade paper options from independent sellers.
- eBay: You can often find bulk paper supplies at competitive prices on eBay.
- Online Craft Retailers:
- Websites like CreateForLess, Paper Source, and Blick Art Materials specialize in crafting supplies, including a variety of paper options.
- Local Art Supply Stores: Independent art supply stores in your area may carry a range of paper suitable for DIY projects.
- Office Supply Stores: Places like Staples or Office Depot often carry a selection of paper that can be used for crafting.
- Discount or Dollar Stores: Sometimes you can find basic crafting supplies, including paper, at discount stores.
- Specialty Paper Stores: Stores that specialize in paper products may have a wide variety of options, including specialty papers like origami paper or textured sheets.
- Online Marketplaces for Handmade Items: Websites like Etsy or ArtFire may have independent sellers who offer unique and specialized paper for crafting.
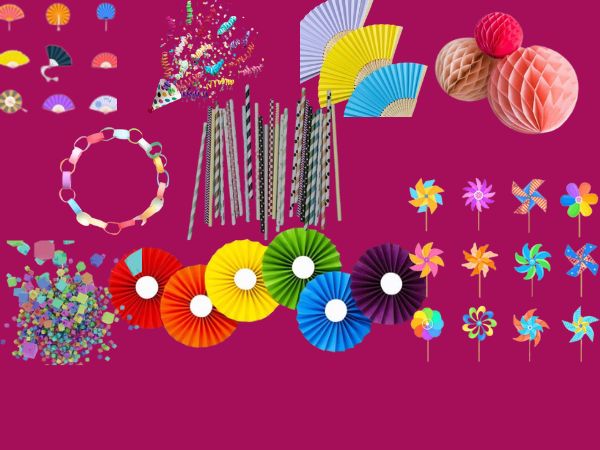
Top DIY Fidget Toys with Paper
Creating DIY fidget toys with paper is a fun and inexpensive way to relieve stress and keep your hands busy. Here are some simple paper fidget toy ideas that you can make at home:
Paper Spinner: A Mesmerizing Toy
If you’re searching for easy yet intriguing DIY fidget toys with paper, make your own paper spinner. These fascinating toys are not only enjoyable to construct but also great to play with. Let’s get the steps of creating a paper spinner:

Creating the Spinner Base
To begin your paper spinner project, you’ll need the following few materials:
- A square piece of paper
- Scissors
- Glue or tape
- A pin or a bead
Here’s how you can create the base of your spinner:
- Start with a square piece of paper. You can use any type of paper you like, whether it’s plain, colored, or patterned.
- Fold the square diagonally in half to make a triangle. Ensure that the edges align perfectly for a neat finish.
- Unfold the paper and repeat the diagonal fold in the opposite direction. Now, Your paper should have an “X” crease.
- Now, fold each corner of the square in towards the center, using the intersection of the “X” as your guide. Your paper should now resemble a smaller square.
- Flip the paper over and repeat the folding process for the other side. You’ll end up with a smaller square once again.
- Carefully open up the last set of folds, revealing a triangle with flaps on each side.
- Take one of the flaps and fold it over the triangle’s edge, aligning it with the center crease.
- Repeat the same fold with the other flap. Your paper should now look like a smaller triangle with two wings.
- Apply a small amount of glue or use tape to secure the flaps in place. Make sure it’s firmly attached.
- Finally, attach a pin or a bead to the center of your spinner using a small piece of tape or glue. This will act as the spinning element.
Adding a Splash of Color
Now that you have the basic structure of your paper spinner, it’s time to make it visually appealing. Here’s how you can add a splash of color:
- Get creative with your choice of colors. You can use markers, colored pencils, or even stickers to decorate your spinner.
- Start by coloring the entire surface of the spinner. This will serve as your canvas.
- Experiment with different patterns, designs, and colors to make your spinner uniquely yours.
- Don’t forget to color both sides of the spinner for an eye-catching effect.
Adding a Spinning Element
Now that your spinner has been attractively colored and embellished, it’s time to add a spinning element to it. Here’s how to go about it:
- Hold your spinner by the pin or bead in the center.
- Give it a gentle flick to set it spinning.
- Watch in amazement as your paper spinner twirls and dances, showcasing your artistic creations.
- You can experiment with different sizes and weights for the spinning element to see how it affects the spinner’s performance.
And there you have it: a captivating paper spinner that is as enjoyable to construct as it is to play with. These stress reliever spinners are also excellent for entertaining friends and family. So take your creative stuff, let your imagination run wild, and spin away.
Paper Straw Bead Bracelet: Stylish and Functional
Let’s look at another intriguing DIY project: the paper straw bead bracelet. This project combines elegance and usefulness, making it an excellent gift for both children and adults. Let’s get started on making paper bead bracelets.

Crafting the Paper Beads
To start creating your paper straw bead bracelet, you’ll need the following materials:
- Paper straws in various colors
- Scissors
- String or elastic cord
- Glue
Now, let’s craft the paper beads:
- Take a paper straw and cut it into smaller segments. The length of each segment will determine the size of your beads.
- Once you have your straw segments, take each one and make a diagonal cut from one end to the other. This will create a long, tapered strip of paper.
- Apply a small amount of glue to one end of the paper strip.
- Roll the paper strip tightly around itself, starting from the glued end. As you roll, the paper will form a bead shape.
- Ensure that the end of the strip with glue is firmly attached to the bead. Hold it for a few seconds until the adhesive hardens.
- Repeat this process with more paper straw segments to create a collection of colorful paper beads.
Stringing the Beads
Now that your paper beads are ready, tie them together to make a fashionable bracelet:
- Cut a length of string or elastic cord, making it long enough to wrap around your wrist with some extra for tying.
- Thread the string through the eye of a needle or use a beading needle if you have one. This will make it easier to string the beads.
- Begin stringing the paper beads onto the cord. You can arrange them in a pattern or create a random mix of colors—it’s entirely up to you.
- Leave a bit of extra cord at each end to ensure that you can tie the bracelet securely.
Securing the Bracelet
To complete your paper straw bead bracelet, follow these steps to secure it:
- Tie a secure knot at the ends of the cord to form a loop. Make sure it’s the right size to slip onto your wrist.
- Trim any excess cord, leaving just enough for the knot to hold firmly.
- Optionally, you can add a dab of clear glue to the knot to reinforce it and prevent it from coming undone.
Paper Pop Its: A Creative Outlet
To make a paper popper, also known as a paper “snap,” you will need a rectangular piece of paper, preferably 8.5 x 11 inches (standard letter size). Here’s a step-by-step guide:
- Start with the paper in a landscape orientation (long side horizontal).
- Fold the paper lengthwise in half, bringing the short sides together. Crease the fold well and unfold.
- Fold the paper in half width-wise, bringing the long edges together. Crease the fold well and unfold.
- Rotate the paper so that the long side is horizontal again.
- Fold the paper in half diagonally, bringing one corner to the opposite corner. Crease the fold well and unfold.
- Fold the paper in half diagonally in the opposite direction, bringing the other corner to the opposite corner. Crease the fold well and unfold.
- You should now have an “X” shape of creases on your paper.
- Hold the paper with one hand on each side, with your thumbs on one side and your index fingers on the other.
- Push your thumbs and index fingers together, causing the paper to pop or snap as the creases unfold.
- Adjust the tension by varying the distance between your thumbs and index fingers until you achieve the desired popping sound.

When playing with the paper popper, remember to be careful not to snap it too close to anyone’s face or ears. Have a good time.
A Paper Squishy: Squeeze Your Stress Away
Along with paper, you’ll need a few additional materials to construct a paper squishy. Here’s a basic approach that involves paper and a few common home objects:
Materials needed:
- Paper
- Scissors
- Glue or tape
- Cotton balls or tissue paper
- Balloons or rubber bands (optional)
Step-by-step guide:
- Start by cutting out two identical shapes from the paper. You can choose any shape you like, such as a circle, square, or heart. Make sure the shapes are large enough to hold the filling.
- Apply glue or tape along the edges of one of the shapes, leaving a small opening.
- Take the cotton balls or crumpled tissue paper and stuff them into the opening. Fill it to your desired level of squishiness.
- Once you’re satisfied with the amount of filling, seal the opening by applying glue or tape.
- If you want to make your paper squishy and more durable, you can cover it with a layer of clear tape or wrap it with a balloon or rubber band. This will help protect the paper and make it last longer.
- Repeat the process with the second identical shape, creating a matching piece.
- Finally, glue or tape the two matching pieces together, aligning the edges. Make sure to leave a small opening unsealed to allow for squishing and releasing air.

Now you have your own paper squishy. You may pinch and crush it while enjoying the tactile experience. To make it more aesthetically appealing, feel free to embellish it with markers, stickers, or other creative tools.
Paper Puzzles:
Materials Needed:
- Paper
- Pen or pencil
- Scissors

Steps:
- Draw a simple design or pattern on a piece of paper.
- Cut the paper into various pieces (like a puzzle).
- Mix the parts and try to reassemble them.
Paper Popper:
Materials Needed:
- A square piece of paper
Steps:
- Fold the paper in half diagonally to make a triangle.
- Fold it in half again to make a smaller triangle.
- Hold the paper by the pointed end and snap it quickly to make a popping sound.
Accordion Fold Fidget: Simple and Effective
Preparing the Paper Strip
Begin by cutting a strip of paper, ensuring it’s long enough for a satisfying accordion fold.

Creating the Accordion Fold
Fold the strip back and forth, like a fan, until you have a series of pleats. This accordion shape provides a satisfying texture to fidget with.
Securing the Fidget Toy
Use a piece of tape or a dab of glue to hold the ends of the accordion strip together. This ensures your fidget toy to maintains its shape.
Paper Chain: Endless Fidgeting Fun
Crafting the Paper Loops
Cut your paper into strips and form loops by connecting the ends. This simple yet engaging fidget toy allows for endless looping and unlooping.

Joining the Loops
Slide one loop through the next to create a chain. You can make it as long as you like, providing ample fidgeting opportunities.
Origami Stress Ball: Squeezable Stress Relief
Folding the Paper
Follow the steps for folding a paper stress ball. The tight structure allows for a satisfying squeeze, making it a perfect stress-relief tool.
Sealing the Stress Ball
Ensure the stress ball is securely sealed to prevent any leaks. This DIY fidget toy with paper offers both tactile and visual appeal.
Paper Fan Fidget: Playful and Cooling
Folding the Paper
Master the art of folding paper to create a fan shape. The motion of opening and closing the fan provides a satisfying fidgeting experience.

Customizing the Fan
Add your personal touch by decorating the fan. This not only enhances its visual appeal but also provides additional sensory stimulation.
Origami Gems
Diamond Delight
Begin with a square piece of origami paper. Follow precise folds to create a mesmerizing diamond-shaped fidget toy. The intricate folds lend a tactile experience that’s both engaging and calming.
Modular Magic
Transform multiple square papers into interlocking modules. These can be assembled into a variety of shapes, providing endless entertainment.
Collage Creations
Whimsical Paper Beads
Roll strips of paper into beads and assemble them into a bracelet or necklace. This not only serves as a fidget toy but also a stylish accessory.
Mosaic Masterpiece
Utilize old magazines to create a tactile mosaic. Arrange and glue paper cutouts into a visually stimulating pattern.
What are some other DIY crafts?
Here are some DIY craft ideas that you can try at home:
- DIY Paper Flowers: Create beautiful paper flowers using tissue paper, crepe paper, or coffee filters. You can use these flowers to decorate your home or as a gift for your loved ones.
- DIY Dream Catcher: Make a dream catcher using a hoop, string, and feathers. This is a fun and easy craft that you can do with your kids.
- DIY Jewelry Organizer: Create a jewelry organizer using a picture frame, wire mesh, and hooks. This is a great way to keep your jewelry organized and easily accessible.
- DIY Envelope: Make your own envelope using paper. You can use this envelope to send letters or as a gift card holder.
- DIY Bookmarks: Create bookmarks using paper, ribbon, or tassels. These bookmarks make great gifts for book lovers.
- DIY Driftwood Art: Collect driftwood from the beach and create beautiful art pieces. You can use the driftwood to make a wreath, a picture frame, or a sculpture.
- DIY Bird Feeder: Make a bird feeder using a plastic bottle, wooden spoons, and bird seed. Hang the bird feeder in your garden and enjoy watching the birds.
- DIY Macrame Plant Hanger: Create a macrame plant hanger using rope or twine. This is a great way to display your plants and add some greenery to your home.
- DIY Wind Chimes: Make wind chimes using seashells, beads, or keys. Hang the wind chimes in your garden and enjoy the soothing sound.
- DIY Firewood Rack: Create a firewood rack using cinder blocks and wood. This is a great way to store your firewood and keep it dry.
I hope you find these ideas helpful! Let me know if there’s anything else I can assist you with.

Customizing Your DIY Fidget Toys
Adding Embellishments
Explore creative ways to enhance your fidget toys with embellishments like stickers, glitter, or small charms. You can easily customize your DIY fidget toys with paper.
Personalizing with Colors and Patterns
Experiment with various types of paper to produce interesting textures and aesthetic appeal for your fidget toys.
Safety Considerations for Children
Choosing Child-Friendly Materials
Ensure that the paper and any additional materials used are safe for children, especially if they are prone to putting things in their mouths.
Avoiding Small Parts
For young children, avoid using small parts like beads or pins that could pose a choking hazard.
Incorporating these safety measures will ensure that DIY fidget toys with paper remain a safe and enjoyable activity for children of all ages.
Conclusion
Making DIY fidget toys with paper is a pleasant and therapeutic pastime that allows for both artistic expression and stress release. These handcrafted toys provide a practical solution to the pressures of a hectic existence. So grab your materials, follow our simple instructions, and get started making your own fidget toys right away.
FAQs on DIY Fidget Toys with Paper
1. Can I use any type of paper for these DIY fidget toys?
Absolutely! You can experiment with different types of paper, from plain to colored or patterned, to create unique textures and visual appeal for your fidget toys.
2. Are these fidget toys suitable for all age groups?
Yes, these DIY paper fidget toys can be enjoyed by people of all ages. Just ensure that you choose age-appropriate materials and avoid small parts for young children.
3. How can I make the fidget toys more durable?
To increase the durability of your fidget toys, consider laminating the paper or using a sealant spray to protect them from wear and tear.
4. Can I add embellishments to the toys for extra flair?
Absolutely! Get creative with stickers, glitter, small charms, or any other embellishments you prefer to add a personal touch to your fidget toys.
5. Where can I find more DIY fidget toy ideas?
For more creative fidget toy ideas and inspiration, explore online crafting communities, Pinterest, and DIY blogs.https://gijoetoysale.com/fidget-toys-for-anxiety-adults-relieve-stress/


1 thought on “DIY Fidget Toys with Paper: Engaging Crafts for Stress Relief”